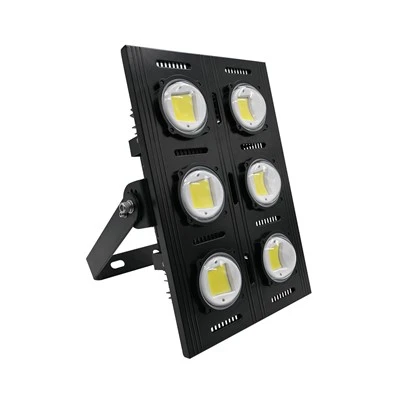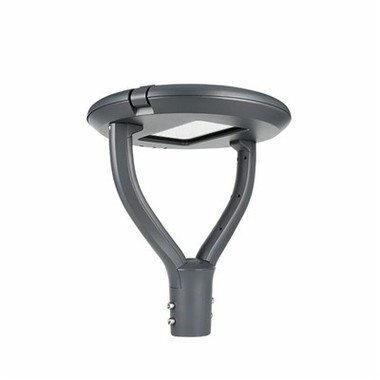

How to Add Outdoor Flood Lights: Step-by-Step Guide for Safe Installation
Jul 11, 2025
Learn how to add outdoor flood lights the right way! This expert-backed guide covers planning, tools, safety tips, and wiring-perfect for DIYers and homeowners.
Looking to beef up your home's security or brighten up the backyard for evening barbecues? Adding outdoor flood light is one of the best DIY upgrades you can make. Whether you're aiming to light up a driveway, patio, or those shadowy corners of your yard, this guide will show you how to do it safely and effectively.
Let's dive into everything you need to know-from planning and prepping to wiring and mounting-with expert insights you can trust.

Why Add Outdoor Flood Lights?
Installing outdoor flood lights isn't just about aesthetics-it's about safety, security, and convenience.
Here's what they bring to the table:
Enhanced security: Bright lights deter intruders and improve visibility around entry points.
Improved visibility: Light up walkways, steps, and driveways to prevent trips and falls.
Better ambiance: Create a cozy outdoor space for entertaining after sunset.
Increased home value: Outdoor lighting can boost curb appeal and property value.
What You'll Need Before You Start
First things first-gather your tools and materials. Here's a checklist:
Tools:
- Voltage tester
- Power drill
- Wire stripper
- Screwdrivers (Phillips and flathead)
- Ladder
- Electrical tape
Materials:
- Outdoor-rated flood lights (LED recommended)
- Weatherproof electrical box
- Outdoor wiring and connectors
- Mounting hardware
- Silicone caulk (for sealing)
Safety first! Always turn off the power at the breaker box before handling any wiring. Use a voltage tester to confirm no current is flowing.

Step-by-Step: How to Add Outdoor Flood Lights
Step 1: Plan Your Lighting Layout
Start by deciding where you want to install your flood lights. Think about:
- Entryways
- Garage doors
- Dark corners of your yard
- Sheds or outbuildings
Pro tip: Avoid pointing lights toward neighbors' windows or directly into traffic to prevent glare or complaints.
Step 2: Choose the Right Flood Lights
Not all flood lights are created equal. Here's what to look for:
LED lights for energy efficiency and long life
Motion-sensor models to save power and add security
Smart-enabled options if you want app control or voice integration
Make sure the lights are UL-listed for outdoor use and weather-resistant.
Step 3: Install the Mounting Box
Use a weatherproof electrical box designed for exterior use. Here's how to install it:
Pick a secure spot on the wall or under the eaves.
Drill pilot holes and attach the box using screws and anchors.
Run outdoor-rated electrical cable to the box, leaving enough slack to work with.
Step 4: Run the Electrical Wiring
If you're replacing an existing light, the wiring might already be there. If it's a new install:
Connect your floodlight to an existing circuit.
Use 14/2 or 12/2 outdoor-rated Romex wire.
Fish the wire through the walls, or secure conduit along the surface.
If you're not comfortable with this step, don't hesitate to hire a licensed electrician.
Step 5: Connect the Wires
Once the wire is in place:
Match the black (hot), white (neutral), and green (ground) wires from the light to the house wires.
Twist together with wire nuts and wrap in electrical tape.
Carefully push the wires into the box.
Step 6: Mount the Flood Light
Attach the light's mounting bracket to the box.
Mount the light fixture to the bracket.
Seal the edges with weatherproof silicone caulk to keep out moisture.
Step 7: Restore Power & Test
Flip the breaker back on and test the light. If you've installed a motion sensor model, adjust the detection range and timer settings.
Maintenance & Pro Tips
Clean the lens regularly to maintain brightness.
Check seals every season to prevent moisture damage.
Replace bulbs or units with dimming or flickering issues.
Consider adding smart timers or dusk-to-dawn sensors for automatic operation
Real-Life Example
Mark, a homeowner in Arizona, installed motion-sensor flood lights on his garage and backyard patio. Not only did it prevent nightly raccoon raids on his trash bins, but it also made his family feel safer when coming home after dark. His power bill? Barely changed thanks to energy-efficient LEDs.

FAQ
Q: Can I install outdoor flood lights myself?
A: Yes, if you have basic electrical knowledge and follow safety precautions. Otherwise, hire a professional.
Q: Are LED flood lights better than halogen?
A: Absolutely. LEDs use less energy, last longer, and run cooler-perfect for outdoor use.
Q: Do I need a permit to install outdoor lighting?
A: In most areas, no permit is needed for low-voltage systems. But check your local electrical codes for full-power installations.
Q: How high should I install my floodlight?
A: Anywhere from 6 to 12 feet off the ground is ideal. Adjust based on coverage needs and light angle.
Q: What's the best placement for security purposes?
A: Position lights to cover all entry points, with minimal blind spots. Pair with cameras for extra security.
Wrapping Things Up
Adding outdoor flood lights might seem like a big project, but with the right tools, a little planning, and some safety know-how, it's totally doable. Whether you're lighting up your backyard oasis or making your driveway more secure, you're improving your home in a meaningful way.
Still unsure? Don't wing it - consult a licensed electrician for complex installations. A safe job is a successful job.
Helpful External Resources
Energy.gov: Outdoor Lighting Tips